This past week I had a sew day at the house, in part, because I had a quilty friend stop by and stay with me while she was in town. I wanted to give a little gift to those who were able to stop by (it was selfish, really, I participated in a Kokka 10" square swap a couple years ago but I had no idea what to do with the fabric and I wanted to use it up).
I had made a fabric box a while back using this tutorial from Seaside Stitches. I had chosen the 10" square fabric size and the box is a great size for me to hold sewn leaders & enders as I complete them and I realized that this would be a great use of the fabrics and a cute gift. It would be a great thread catcher.
With the aid of Karie (my guest) of Two Kwik Quilters (IG: @karitkq), I sewed up several boxes with a slight variation. I made them taller, which allows them to act as a tool holder. The tutorial calls for a diagonal to be sewn using a 2" measurement for a square box but if you use a 2.5" measurement, you will get the taller box.
I also want to share a quick weekend quilt top finish. Karie gifted me with her pattern Kwik Trio of Stars and we had fun pulling fabric for the project her last night here. After she left, it only took me a few hours to stitch this up. I left off one additional white border (personal preference for the finished look, and no other reason). I plan to donate this to a quilt drive held in the Spring (more on that another day). Isn't this darling?
I'm in love with these little boxes and the quilt top so I am sharing them with the very new "SewJo Saturday" linky party being held by Kim on over at My Go-Go Life. Take a look at all the great and fun projects linked up over there!
Cheers!
Beck
This blog is primarily about quilting & sewing but also incorporates a bit about my journey to a healthy lifestyle and my family. All of it will include a healthy bit of sarcasm, mostly at myself, but really, none one is safe!
Saturday, March 15, 2014
Sunday, March 2, 2014
Stitch that Stash Bee block
For my bee block, I am turning to 13 Spools Improv Herringbone Tutorial. I love the look of this block and would like a colorful quilt that is sort of tonal but not necessarily all solids.
In progress...
To my bee-olleagues, I used Kona White as the strip fabric. As for color, please choose whichever you would like. The nature of the block has light and dark contrast so as long as the block is in the same color family and doesn't have a noticeable of contrasting color in the individual fabrics, I will love it.
Did that make sense? I guess I'm saying it doesn't need to be tone-on-tone, but if you are doing a green block and your green fabric has bright red stars, I would prefer that not be used. However, if your green has something like tiny yellow stars, it might be okay. In short, the fabric should clearly "read" the color, I think. -sigh- I don't know if that makes any more sense but there you have it.
Okay, so this block takes a little time because of all the pieces. Once done, it is 11.5" unfinished. If you can do two blocks, that would be great but if one is all you have in you, I am completely good with that. I leave it up to you and whatever you choose/have time for. :)
I can't wait to see what you ladies come up with!
Cheers!
Beck
In progress...
To my bee-olleagues, I used Kona White as the strip fabric. As for color, please choose whichever you would like. The nature of the block has light and dark contrast so as long as the block is in the same color family and doesn't have a noticeable of contrasting color in the individual fabrics, I will love it.
Did that make sense? I guess I'm saying it doesn't need to be tone-on-tone, but if you are doing a green block and your green fabric has bright red stars, I would prefer that not be used. However, if your green has something like tiny yellow stars, it might be okay. In short, the fabric should clearly "read" the color, I think. -sigh- I don't know if that makes any more sense but there you have it.
Okay, so this block takes a little time because of all the pieces. Once done, it is 11.5" unfinished. If you can do two blocks, that would be great but if one is all you have in you, I am completely good with that. I leave it up to you and whatever you choose/have time for. :)
I can't wait to see what you ladies come up with!
Cheers!
Beck
Tuesday, February 11, 2014
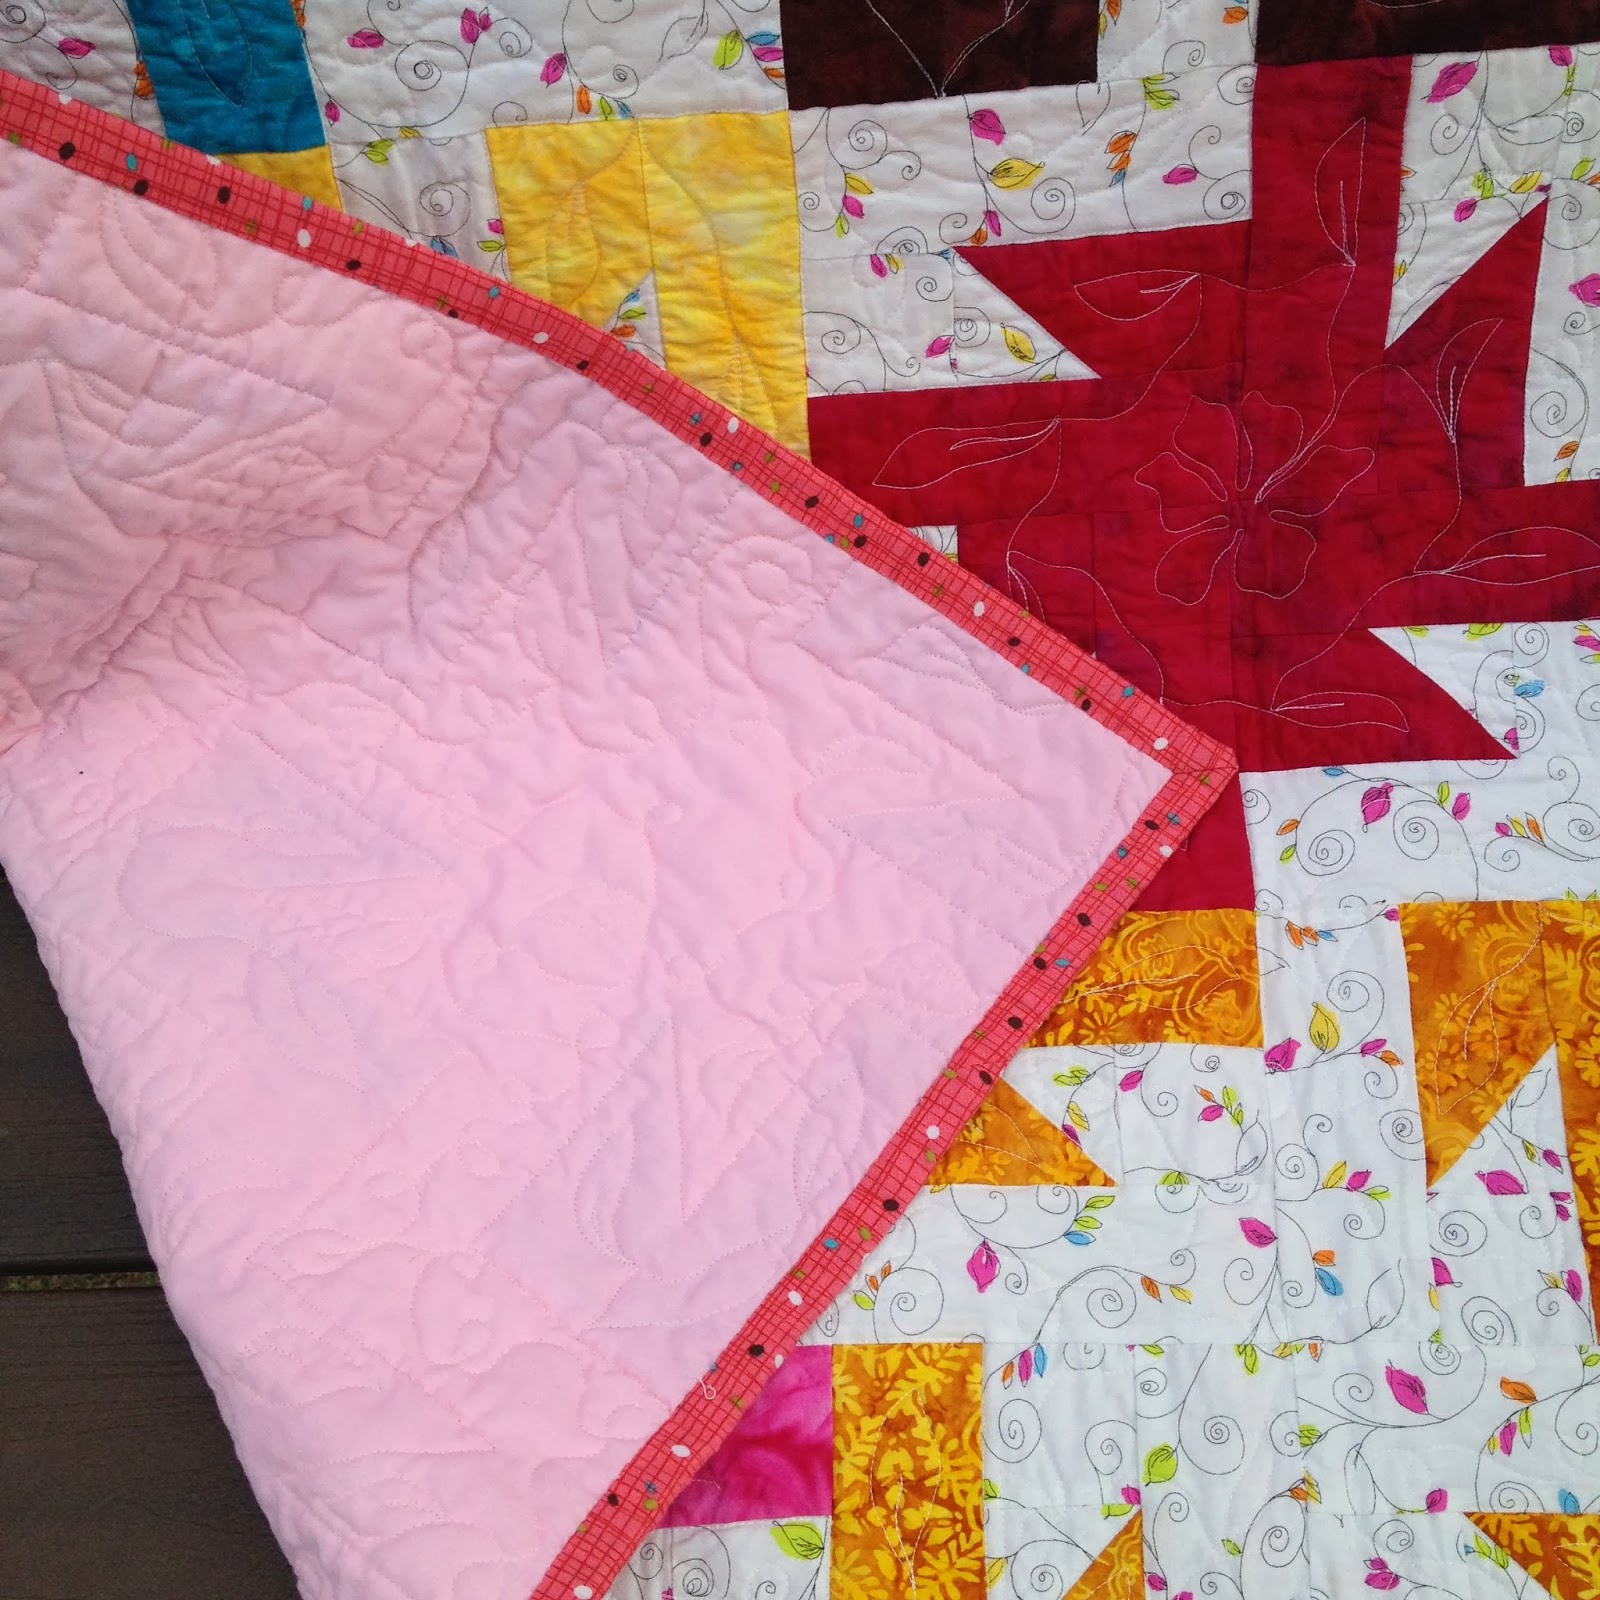
The "Learning to Love Batiks" Quilt
When I attended The Stash Bash in 2013, I thought about purchasing a jelly roll of batiks. I think, at the time, I was trying to challenge myself to come up with a quilt that focused on the batiks (instead of using them as blenders) even though I was less than enthusiastic about them. Of course, when you are at a retreat with wonderfully supportive quilters, who also happen to be wonderfully sarcastic and eager to encourage someone to be crazy, that thought developed into an actual purchase.
So, I came home and auditions fabrics to go with the bright, rainbow batiks and I auditioned patterns until I finally came up with what I thought would work. I ended up using this Bold and Beautiful print by Michele D'Amore for Benartex I had in my stash, which was perfect, and the "Sparkler" quilt pattern by Freshly Pieced.
I really like how the top turned out. I think the use of a print instead of a solid with the batiks makes it interesting and attractive.
I decided the quilting needed to mirror the fabric designs so I created meandering and twining leaves with a loose flower in certain blocks. I felt like it kept the design a little whimsical and feeling like Spring somehow.
In keeping with the "spring" feel, I used one layer of Warm and Natural 80/20 batting and a solid pink fabric as the backing of the quilt and hand sewed a multi-color dot fabric on for the binding.
Since it measures approximately 56.5" square, it is a nice, light weight quilt that is perfect for draping over your legs when sitting on the porch on a spring or summer evening. I have already washed it (I wanted to be sure there wasn't any color bleed from the batiks) for these pictures and I'm kinda glad I did. The crinkly look suits it.
So, do I now love batiks? No. Do I hate them? No. I think they are like any other fabric. There are good and bad prints that can be used for beautiful or questionable creations. It's all a matter of personal taste. It is unlikely I will purchase more again anytime soon, though. That's just me.
Oh, and I think I'm renaming this quilt "Spring" and I have decided to sell it. Now to figure out how to do that. :)
Cheers!
Beck
Friday, February 7, 2014
Heart Block Tutorial
Okay, this may be more like a loose guideline rather than a tutorial. I originally created this block when I was at
the Stash Bash last April. Sharon (A
Prairie Sunrise) was unable to come to the retreat due to being late in her
pregnancy and so a baby quilt was planned and block contributions made using
the Ruby fabric line. Since there were
only scraps to work with but plenty of white, I wanted to figure out a unique
block with big impact. I opted for the
slightly off center heart and I love the way it looks. It’s super sweet to see it in the full quilt
sent off to Sharon and her beautiful girl, Ruby Verna. The ladies who contributed the rest of the
blocks knocked it out of the park, too, don’t you think? See the quilt details
here from Chris (Freckle Mama).
So, here we go. Finished block
(without borders) comes out to 12.5” (your choice)
Choose your background fabric and the fabric for your heart (2 colors). Roughly you can an FQ for your background
will be more than enough and you can use 2 jelly roll strips for the colors.
From your background cut:
1, 2” x 13” strip
1, 3 ½” x 13” strip
2, 6 ½” x 1 ½” strip
1, 5 ½” x 1 ½” strip
1, 5” x 1 ½” strip
4, 4 ½” x 1 ½” strip
1, 4” x 1 ½” strip
2, 3” x 1 ½” strip
4, 2 ½” x 1 ½” strip
4, 2” x 1 ½” strip
4, 3 ½” x 1 ½” strip
14, 1 7/8” squares
From EACH color cut:
7, 1 7/8” squares
2, 1 ½” squares
Take 1 white 1 7/8” square and put it right sides together with 1 color
1 7/8”. On the back of the color square,
draw a diagonal line from corner to corner.
Take to the sewing machine and sew 1/4” away from the line on both sides
of the line. Cut on the diagonal line. Press open and trim wings. Repeat for
all the white and color squares creating 28 half square triangle (HST) blocks. (see all steps here)
Lay out your block in accordance with the diagram below.
You can play with the HST layouts if you want. The picture above is what I went with but the ones below are alternative ideas. You can see, in the last photo, an alternating option I used for the original block.
Trim to 12 ½” or 12 ¼” and voila! Your block is done.
I decided to make this into a pillow cover so I added 2 borders. At this point, I basted the block to batting
using a basting spray and quilted it. Then, I used Sew Mama Sew’s Tutorial to
create a cover for an 18” pillow form.
Check out the quilting! Did this on my domestic and it's pretty even for a first time. I've never been able to and always had to put these on the frame but now I feel good about small projects getting done on the domestic, too. Yay for small accomplishments.(she really wants to lay on the pillow)
Cheers!
Beck
Tuesday, February 4, 2014
Another Pinwheel Quilt and more Mug Rugs?
Yes, yes I did. I love the pinwheel block. The many variations, all of it and Rachel Griffith's Pinwheel Sampler pattern just sings to me.
I decided to take a class from Rachel at the Fredricksburg Sewing Expo this past October where she taught how to make this sampler. Yes, I've made it 3 or 4 times before, but I was using this class as a good cause. I REALLY wanted to make a Christmas quilt with all my holiday fabric and I always put it off. I figured this pattern would be a great way to get that done. Of course, as I pulled the fabrics, I realized that I had plenty of Christmas prints but of two distinct styles. Half were fun and funky and of non-traditional colors. The other half were the traditional prints and colors. After checking, they do not blend well. Well shit.
I thought and thought and then realized that I had plenty of pinks and Oct. was breast cancer awareness month so why not make a pink quilt and donate it?
This one came together pretty quickly because when you love a block like this like I do, you want to see it together ASAP.
I did quilt this baby but do not have photos (I forgot, I'm sorry). I asked my Instagram friends where I could donate it and received a message from someone who had a close relative going through the fight and asked if I would be willing to pass it to her to give. I immediately agreed, the best use of a quilt is to comfort someone who needs it and let them know they are thought of and loved. The requester offered to bind the quilt and I'm sure it is now providing a good hug for the person who needs it. Whether you know who is receiving your quilts or not, the feeling of peace for doing something kind lives within you for a long time after the gift has been given.
Speaking of Christmas and gifts, I will leave you with some Christmas mug rug creations.
This first is a very simple but effective little something to add color to the dessert counter.
Next, double sided Mug rugs for niece and nephew who have been all about hot cocoa this year. Mike and I also got them custom mugs and the kids bought them a variety pack of hot cocoas to try.
Another gift to a friend just to send a little Christmas hello.
Cheers!
Beck
I decided to take a class from Rachel at the Fredricksburg Sewing Expo this past October where she taught how to make this sampler. Yes, I've made it 3 or 4 times before, but I was using this class as a good cause. I REALLY wanted to make a Christmas quilt with all my holiday fabric and I always put it off. I figured this pattern would be a great way to get that done. Of course, as I pulled the fabrics, I realized that I had plenty of Christmas prints but of two distinct styles. Half were fun and funky and of non-traditional colors. The other half were the traditional prints and colors. After checking, they do not blend well. Well shit.
I thought and thought and then realized that I had plenty of pinks and Oct. was breast cancer awareness month so why not make a pink quilt and donate it?
This one came together pretty quickly because when you love a block like this like I do, you want to see it together ASAP.
I did quilt this baby but do not have photos (I forgot, I'm sorry). I asked my Instagram friends where I could donate it and received a message from someone who had a close relative going through the fight and asked if I would be willing to pass it to her to give. I immediately agreed, the best use of a quilt is to comfort someone who needs it and let them know they are thought of and loved. The requester offered to bind the quilt and I'm sure it is now providing a good hug for the person who needs it. Whether you know who is receiving your quilts or not, the feeling of peace for doing something kind lives within you for a long time after the gift has been given.
Speaking of Christmas and gifts, I will leave you with some Christmas mug rug creations.
This first is a very simple but effective little something to add color to the dessert counter.
Next, double sided Mug rugs for niece and nephew who have been all about hot cocoa this year. Mike and I also got them custom mugs and the kids bought them a variety pack of hot cocoas to try.
Another gift to a friend just to send a little Christmas hello.
Cheers!
Beck
Subscribe to:
Posts (Atom)